An IP address is a numerical label that uniquely identifies devices on a network. There are two types of IP addresses, public and private. A private address is used for labeling devices within an internal network and is globally unreachable.
On the contrary, public IPs are globally routable and are important for connecting to the internet. This guide shows how easy it is for Linux users to get IP address information on their computers.
How Do IP Addresses Work?
You need to know a few things before learning how to find the IP address of your Linux machine. When connected to the home network, all your devices have unique private IPs. However, you can’t connect to the world wide web via private addresses. You’re going to need a public IP to do so.
Your router assigns you the public IP when you make web requests from one of your devices. There’s an entire mechanism called Network Address Translation (NAT) to do this. NAT works by substituting the private address from the IP packet header with a globally accessible public IP.
Find Private IP Address of a Linux System
According to RFC 1918 (Address Allocation for Private Internets), private networks can have IPs within the ranges given below. Here X represents any number between 0 to 255.
10.X.X.X – 10.X.X.X
172.16.X.X – 172.31.X.X
192.168.X.X – 192.168.X.X
There are several ways to check private IP addresses in Linux. The easiest of them is the Linux ip addr command.
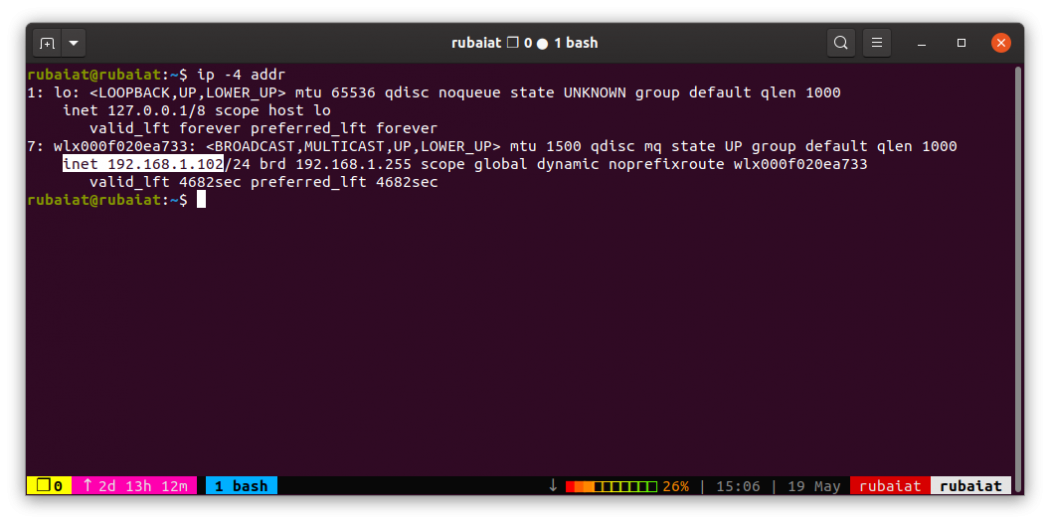
ip -4 addr
This command displays both the loopback address (127.0.0.1) and the actual private address of the machine.
Use the following command on Linux if you want to get only the IP address of the system.
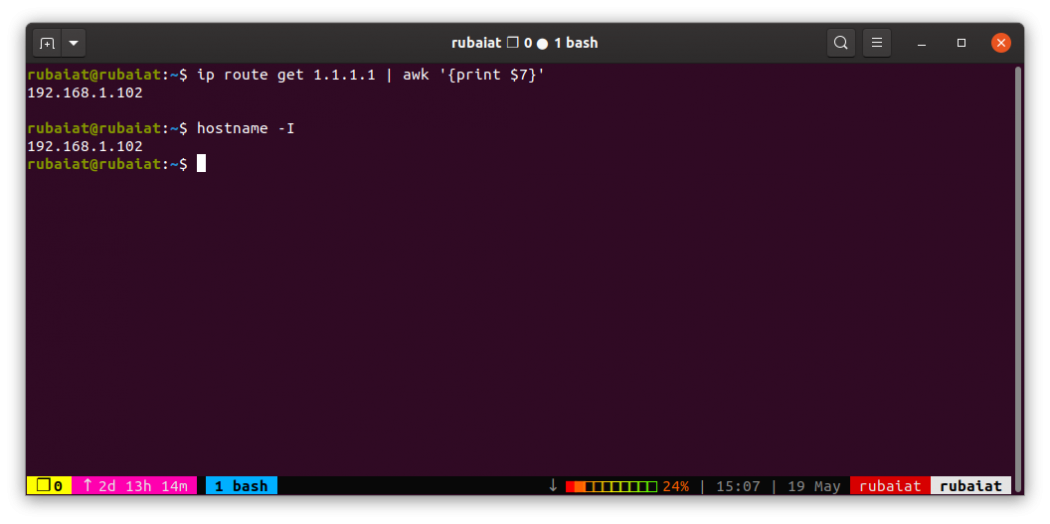
ip route get 1.1.1.1 | awk '{print $7}'
Alternatively, you can use the hostname command on Linux to get the IP address of a host.
hostname -I
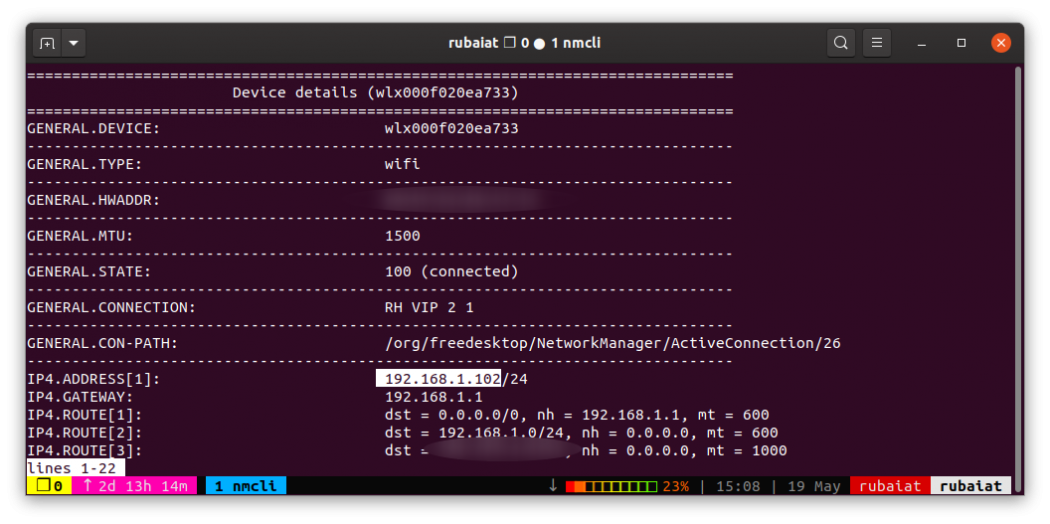
You can also use the nmcli utility to get the private IP address of your interface. It’s a console-based program for managing the network manager.
nmcli -p device show
Find Public IP Address of Linux Systems
As NAT is responsible for assigning the public IP for your system, you can’t get it directly from the device. Instead, you need to send a web request to an external system and retrieve the IP address from the response.
Use one of the following Linux commands to get your public IP address from the command line.
However, the simplest way for Linux users to get the public IP address is via a simple Google search. All you need to do is type "what is my ip" in a new search, and Google will tell you the public IP address.
Since websites can track users and geolocation using IP addresses, many people choose to hide their IP. There are several ways to hide your IP address on Linux.
VPN: A VPN (Virtual Private Network) acts as an intermediary between your device and the website you want to visit. They mask your IP by making it look like the requests have originated from the VPN server instead of your machine. Apart from masking IP, there are other reasons for using VPNs as well, including data encryption and bypassing censorship.
Tor: It’s a secure network consisting of thousands of nodes run by volunteers all over the world. Tor provides anonymity by relaying traffic through many anonymous nodes. You can use the free Tor browser for hiding IP on Linux.
Proxy: Proxy servers make it look like your web requests are originating from their system. They don’t encrypt data and are often unreliable compared to VPNs or Tor.
Get IP Address on Linux Instantly
As illustrated throughout this guide, it’s very simple for Linux users to get their IP addresses. You can find both the private and public IP addresses of your system using the methods described above.
But what if you want to find your phone’s IP address? Luckily, it’s as easy as finding the IP of your computer, if not easier.
L-to-r: Tony Hale as Dr. Curtain and Tony Hale as Mr. Benedict.Screenshot: Disney
Precocious, adventurous kids are a dime a dozen. Tony Hale? Less so. Yet somehow, Disney+’s upcoming adaptation of The Mysterious Benedict Societychildren’s books features Tony Hale recruiting a quartet of precocious, adventurous kids to stop the nefarious plans of… Tony Hale?
Of course, anyone who’s read Trenton Lee Stewart’s four-book series knows that the good-hearted but eccentric Nicholas Benedict has an evil twin, named Ledroptha Curtain. I’ll let Disney+ explain the rest:
“After winning a scholarship competition, four gifted orphans are recruited by the peculiar Mr. Benedict for a dangerous mission to save the world from a global crisis known as The Emergency. Reynie, Sticky, Kate, and Constance must infiltrate the mysterious L.I.V.E. Institute to discover the truth behind the crisis. When the headmaster, the sophisticated Dr. Curtain appears to be behind this worldwide panic, the kids of ‘The Mysterious Benedict Society’ must devise a plan to defeat him.”
The streaming service also released the first trailer for the series, which seems pleasant enough, although boy howdy these four kids seem extremely young:
Of course, their youth will likely prove a benefit if The Mysterious Benedict Society proves a hit and earns more seasons to adapt the three remaining novels.
G/O Media may get a commission
In addition to multiple Hales, the show also stars Kristen Schaal as Number Two, Mystic Inscho as the logical Reynie Muldoon, Emmy DeOliveira as the tool-wielding Kate Weatherall, Marta Timofeeva as the mind-reader Constance Contraire, and Seth Carr as George “Sticky” Washington, who has an eidetic memory. Meanwhile, you can try your best to remember The Mysterious Benedict Society premieres on June 25 on Disney+.
For more, make sure you’re following us on our Instagram @io9dotcom.
U.S.A. –-(AmmoLand.com)- New and existing subscribers to the AmmoLand News emails will ALL be eligible to win 5,000 rounds of CCI Blazer 9mm Ammo! At a time when ammo is nearly impossible to find, AmmoLand has decided to help one lucky winner with this giveaway of 5,000 rounds of CCI Blazer 9mm ammunition.
AmmoLand is giving our readers yet another opportunity to take home an amazing giveaway, this time it’s 5,000 rounds of 9mm ammo. One lucky winner will receive 5 boxes of 1000 rounds each, boxed 50 rounds per box in the 1000 round case.
AmmoLand Giveaway – 5,000 Rounds of CCI Blazer 9mm Ammo
CCI BLAZER BRASS 9MM LUGER AMMO 115 GRAIN FULL METAL JACKET
CCI Blazer Brass 9mm Luger Ammo 115 Grain Full Metal Jacket ammo made by CCI is your best choice for bulk 9mm target shooing ammunition. Newly manufactured 9mm ammo here in the United States, that features a full metal jacket copper plated bullet, brass casing, non-corrosive primers. Made by the same company that manufactures Speer Lawman 9mm ammo as well as the Federal American Eagle 9mm ammunition Blazer Brass 9mm Luger ammo features the same great quality components and manufacturing equipment. If you choose to reload your 9mm ammo, CCI Blazer Brass offers virgin brass that can be reloaded up to 5 times due to its exceptional high quality and low mixtures of other materials. Trusted CCI has gone above and beyond with the Blazer Brass line! With the same high standards that shooters have come to know and love with standard Blazer ammo, the Blazer Brass line gives the benefit of a brass casing making it reloadable. 9mm Luger by CCI are an excellent choice for target practice or just plinking around at the range. CCI Blazer Brass 9mm Luger is new production, non-corrosive, re-loadable ammunition with boxer primers and brass casing.
9mm ammo is by far the most popular gun cartridge in the world. Recently adopted by the FBI and other law enforcement agencies, 9mm ammunition is perfect for target shooting and personal protection as well. 9mm ammo is fun to shoot, offers relatively low recoil and yields great target results.
CCI Blazer Brass 9mm Luger is new production, non-corrosive, re-loadable ammunition with boxer primers and brass casing.
Blazer Brass 9mm ammunition is perfect for target shooting and personal protection as well.
Manufacturer – CCI AMMUNITION
Caliber – 9MM LUGER
Bullet Type – Full Metal Jacket
Muzzle Velocity – 1125 fps
Muzzle Energy – 323 ft lbs
Primer – Boxer
Casing – Brass Casing
Ammo Rating – Target and Practice 9mm Ammo
How to Win 5,000 Rounds of 9mm:
Click the AmmoLand Giveaway button on the bottom right of any AmmoLand.com page
Click Subscribe to Our Newsletter for one entry, existing subscribers you are already in the running, who loves you?
Click Visit AmmoLandTV on YouTube and like and follow for another entry
Click Visit @AmmoLand on Instagram and like and follow for a third entry
AmmoLand Giveaway Rules:
The giveaway entry dates run from May 25th, 2021 to July 1st, 2021 with the winner drawn on July 2nd, 2021.
Everyone who signs up, or is an existing active subscriber, to the AmmoLand Shooting Sports News daily digest email are eligible to win.
Eligible Winners must be 18 years of age, a legal resident of the United States, and be lawfully eligible under local, state, and federal rules to accept the transfer of Firearms through a licensed Federal Firearms Licensee. NOTE: All Federal, State and Local gun magazine restrictions apply. You can view a sample of typical restrictions here or here.
FFL Transfer Fees and Taxes are not included and are the winners’ responsibility.
No monetary compensation or substitution for ineligible winners.
Do you get our daily email? Then you are already entered. Do you need to sign up? Then you can do so at the link/box above: Sign up for AmmoLand in your Inbox!
What’s that you say? You never win anything or maybe 5000 is not enough ammo and you need more, then check out our 9mm Deal Tracker page page found here!
About AmmoLand.com:
Ammoland.com is the web’s leading Shooting Sports News Service for the Ammunition, Firearms, Shooting, Hunting, and Conservation communities. AmmoLand has a FREE Shooting Sports News Service that is seen by 10,000’s of Ammunition, Shooting, and Pro Firearms enthusiasts every day. Visit them at www.AmmoLand.com
Don’t delay! Be sure and Sign Up before we pick a winner.
Despite the prevalence of free and paid streaming services, DVDs and Blu-rays persist. So, if you’ve got shelves full of DVDs and Blu-rays waiting to be ripped, we’ve got the tools you need to digitize your collection.
Here are the best tools for ripping DVDs and Blu-rays to your computer.
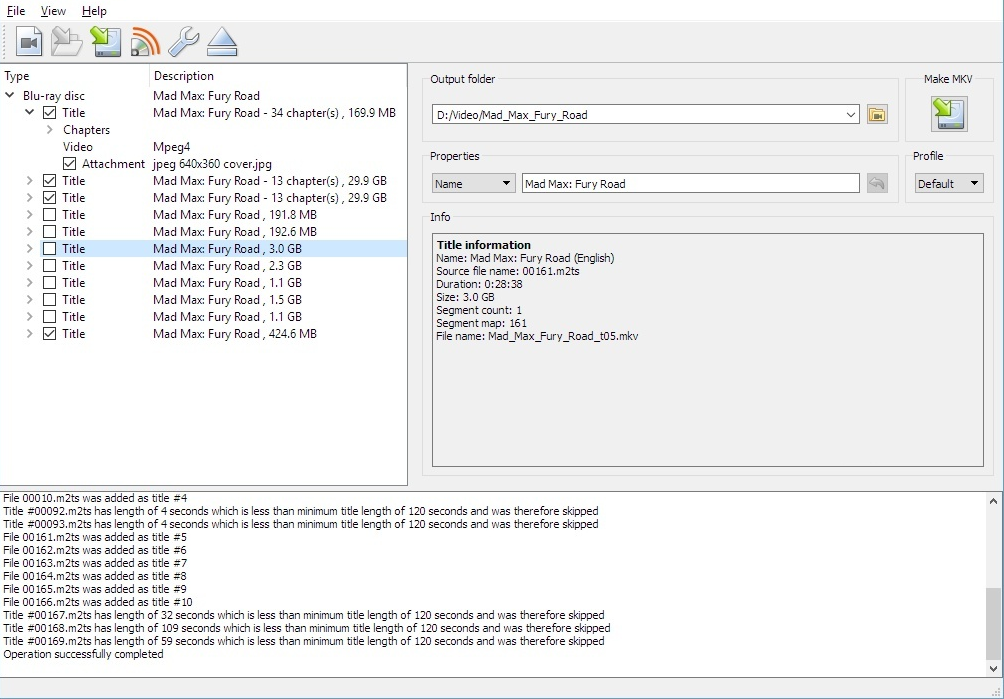
In MakeMKV, you’ll find a superb cross-platform Blu-ray and DVD backup utility. It boasts DVD and Blu-ray decrypter functionality. To rip a DVD or Blu-ray to your computer, pop in a disc, select the media in MakeMKV. Upon doing so, MakeMKV runs through some initial work loading information. You’ll see the various titles and can expand the sections to view subtitle and audio track information.
From here, select the subtitle and audio tracks you’d like to rip, along with the titles you want to transfer. Generally, the title with the most tracks will be the feature, while smaller titles are bonus features, deleted scenes, or whatever else is on the disc. However, this varies by disc. Deselect everything you don’t need, then click the MakeMKV button.
Now, let MakeMKV get to work. DVDs typically rip in under 20 minutes. However, Blu-rays can range from 30 minutes to a couple of hours depending on the length of the movie and the extras you want.
MKV files are slightly smaller than original disc images. DVD backups are about 10% smaller, with Blu-ray rips roughly 40% smaller than their disc counterparts. Ripping a Blu-ray disc provides a much larger file than a DVD, well over 4GB. While a Blu-ray MKV rip provides maximum quality, it takes up more space. Converting your MKV to another format such as an MP4 might produce a smaller file, albeit at the cost of audio and video quality.
Handbrake is a fantastic open-source DVD ripper. It’s a completely free Blu-ray ripper. Aside from ripping DVDs and Blu-rays, Handbrake can do lots of clever things, including converting videos, adding subtitles to films, and more.
Simply select a profile depending on the target device or quality, decide if you want to use Handbrake to attach subtitles to a movie file, then hit Start Encode.
Presets range from device options including iPad and iPod to high-quality 1080p options, and more. Plus, you can pick different formats such as MP4, H.265, and H.264.
Since you can tweak tons of settings or merely choose a preset and start encoding, Handbrake is as intuitive or complicated as you make it. Overall, it’s one of the best free DVD rippers you can download.
This Blu-ray and DVD decrypter is cross-platform, free, and open-source. Moreover, frequent updates ensure that Handbrake offers a cutting-edge feature set.
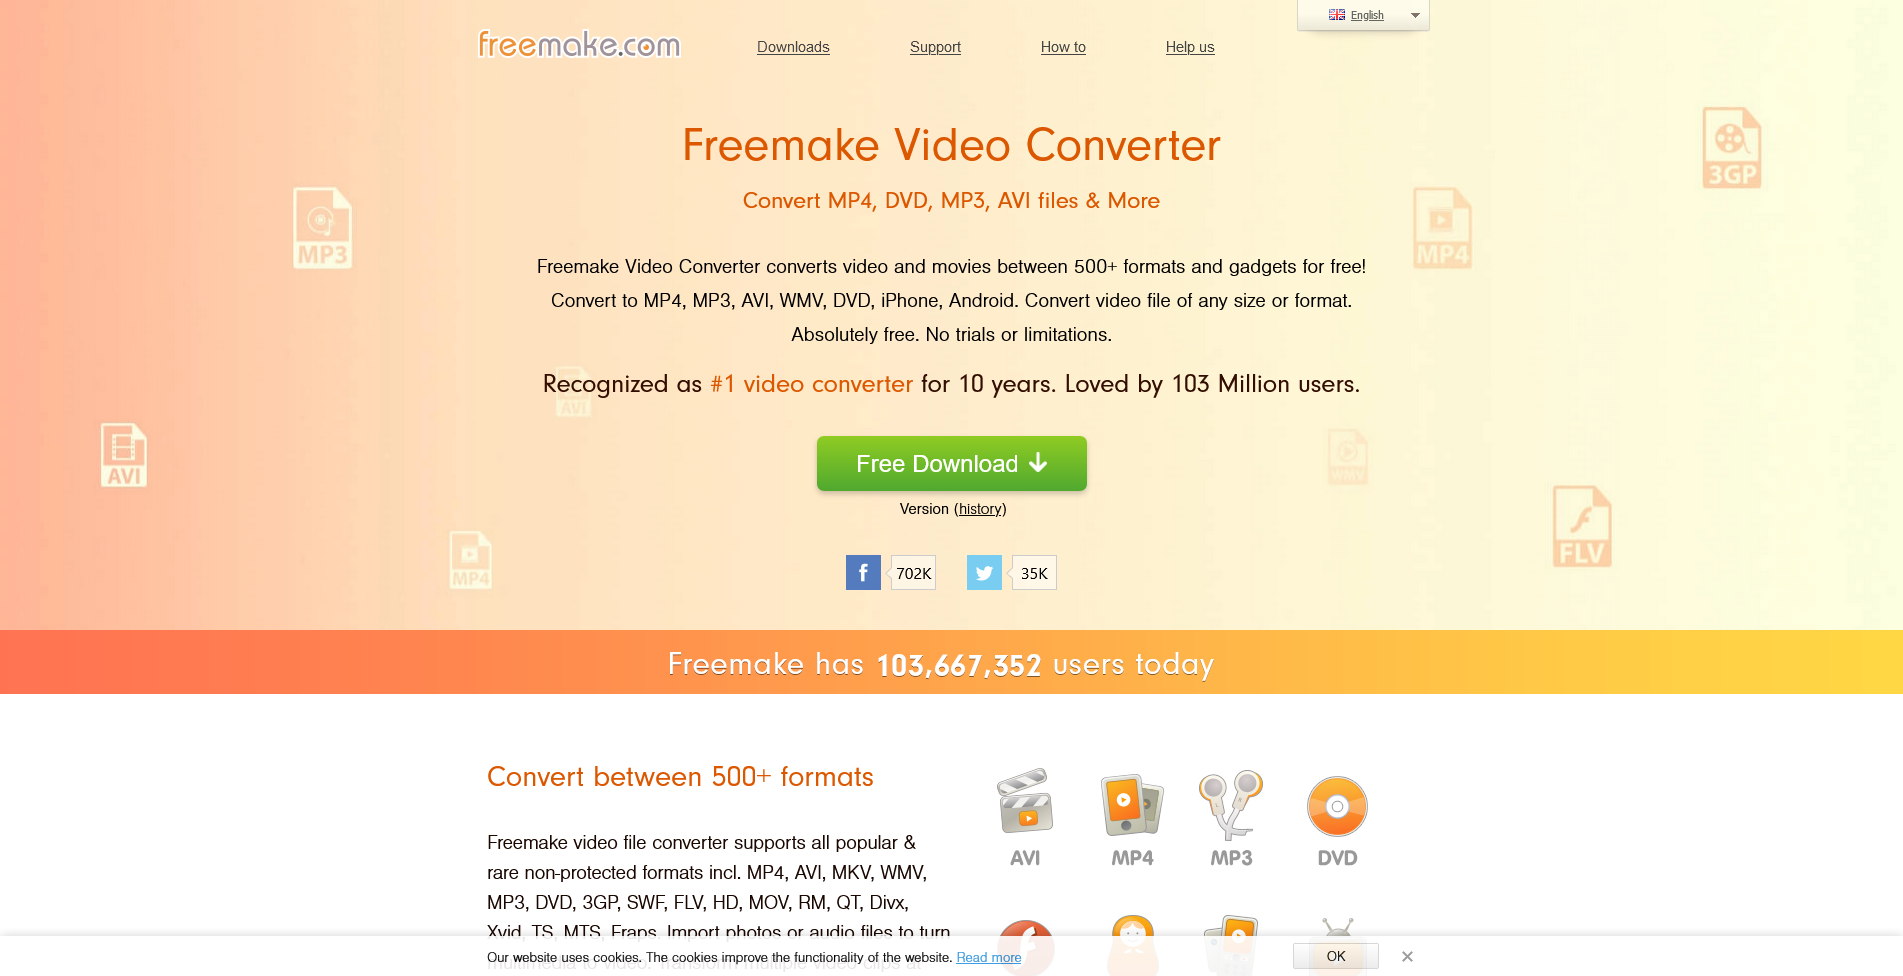
Freemake remains a top choice for DVD ripping software. What’s neat is Freemake’s arsenal of video editing options. Not only is Freemake one of the top free DVD ripping software options available, it’s packed with editing capabilities.
Using Freemake, you can join files together. You can even join up files to have one big merged file. Videos can also be converted to Flash or HTML5, as well as MP3. Among its many output file formats, you can rip DVDs to MP4, AVI, MKV, 3GP, and more.
One great feature is when you rip it to become a DVD, you can also add a menu with clickable chapter titles. With its ability to rip videos to a variety of formats as well as video modification, Freemake is an excellent free DVD ripper.
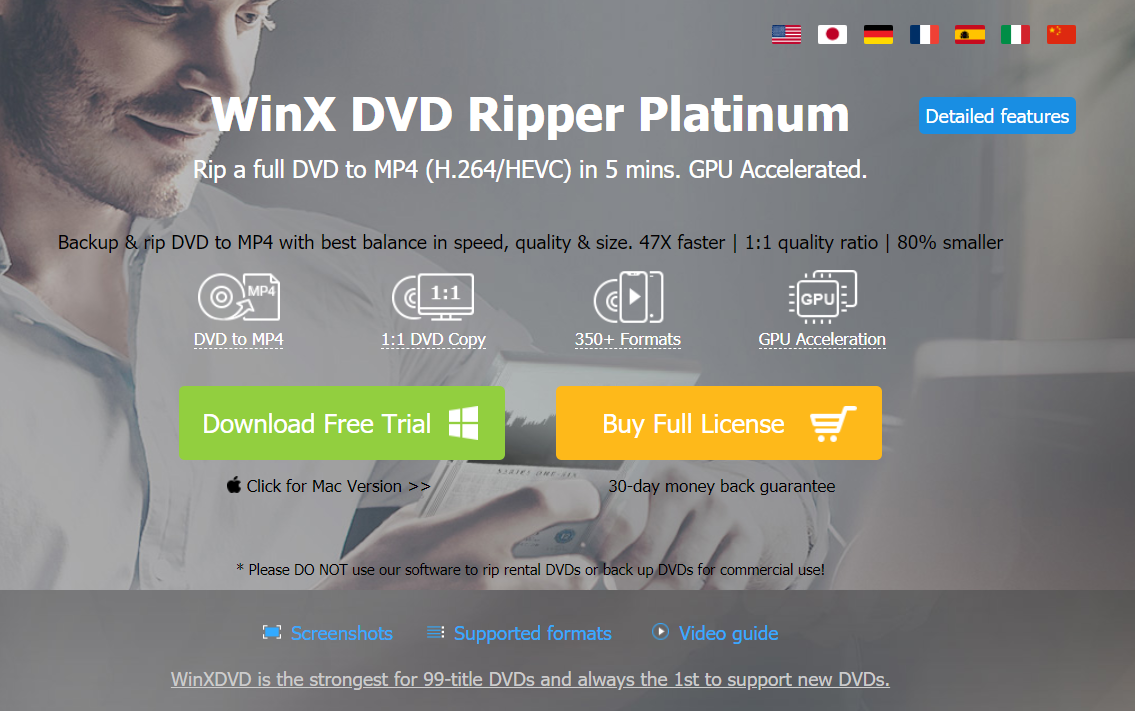
WinX is another one of the best DVD rippers. It comes in two flavors: there’s a free DVD ripper as well as WinX DVD Ripper Platinum Edition. While WinX’s def ripping software is free, it’s basically a trial version of the Platinum edition. However, once the trial expires, it’s totally usable and merely drops a few premium features.
The free iteration will rip a DVD to MP4, WMV, AVI, FLV, MOV, MPEG, H.264, iPhone, iPod, Apple TV, Android, Samsung, HTC, and PSP. With it, you create an exact 1:1 clone with no quality loss. WinX DVD Ripper boasts a fast backup speed, with taking roughly five minutes to create an MPEG2 copy of a DVD.
The Platinum version adds additional output formats, such as creating ISO files. You’ll see faster ripping speeds as well as video editing features. WinX DVD Ripper is a superb alternative to Handbrake and Freemake.
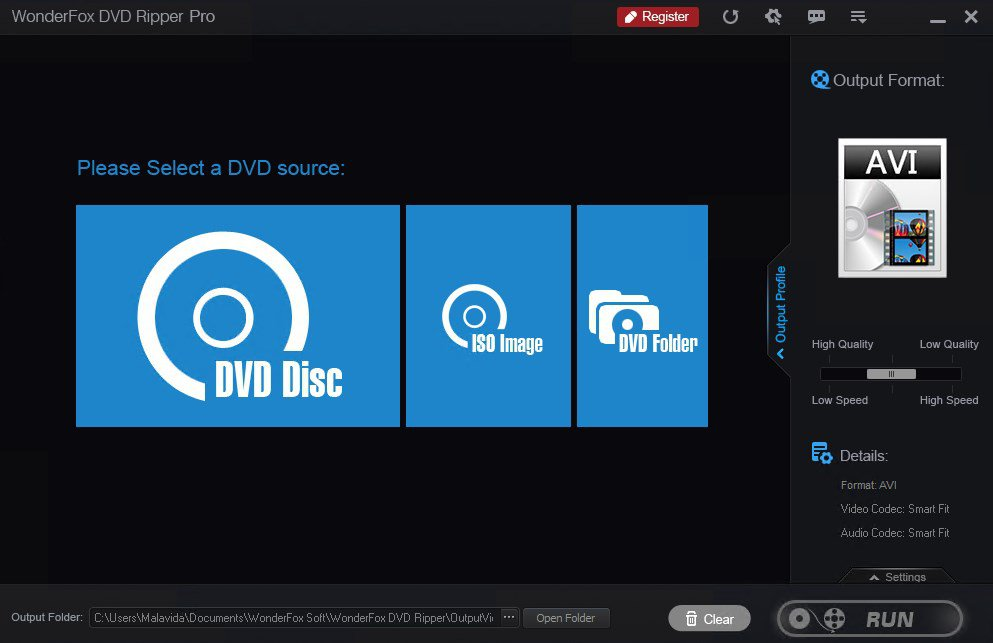
In addition to WinX, we really enjoyed WonderFox DVD Ripper Pro. It’s simple to use, making DVD ripping easy. Just pop in a DVD, select your preferred output format, and start digitizing your DVDs.
WonderFox DVD Ripper Pro lets you quickly back up DVDs in as little as five minutes, and can create 1:1 copies for top-notch quality.
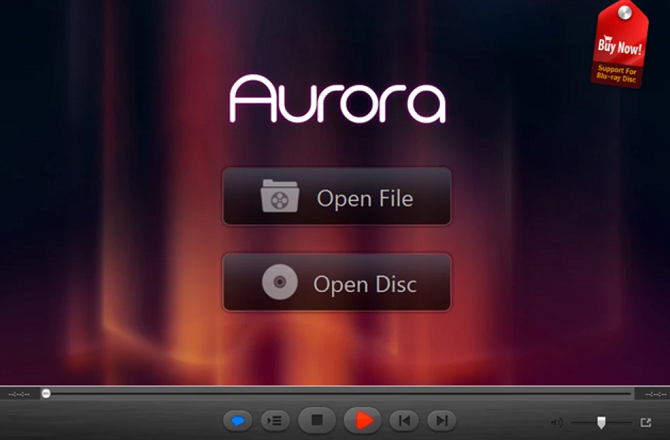
Aurora is a free Blu-ray ripper that sports cross-platform compatibility. It will burn the Blu-ray disc into an ISO file, and then burn the ISO file onto a blank disc. Alternatively, simply use media server software such as Plex to play your ISO files. This is a powerful Blu-ray decrypter that’s fast and free.
While Aurora includes a solid feature set, it’s limited as Blu-ray ripping software. You may copy a Blu-ray to an ISO file. Unlike options such as Handbrake, WinX DVD Ripper, or MakeMKV, you won’t find additional video file output formats or compression tools.
Still, Blu-ray ripping is indeed speedy, and it’s a robust Blu-ray ripper with Mac and Windows installers.
Aptly named, CloneDVD clones your DVDs. Simply insert your disc, select which chapters you want copied, choose your language, whether you want subtitles, then rip your DVD.
Once the file, in DVD format, has been copied to your computer, you can burn the ISO to a blank DVD disc, use software like Handbrake to convert your DVD file to an MP4, or mount the ISO file on your computer using a virtual drive.
Aside from its DVD backup utility, there’s Blu-ray ripping software as well. CloneBD can back up entire Blu-ray discs as ISO files, or output to the likes of MKV, AVI, and MP4.
CloneDVD costs $50; CloneBD will set you back $100.
While there are loads of video playback apps, VLC remains one of the most popular and feature-rich media players.
VLC Player rightfully earned its reputation for being able to play virtually any video format you want to watch. Although it’s commonly considered the go-to for media playback, you can also use VLC to rip a DVD or Blu-ray.
Choose what you want to be converted, select No disc menus if you don’t want menus, point VLC to the disc drive on your computer, then click Convert/Save. Ripping can take quite some time, though. Some users have reported it taking up to two hours. Options like MakeMKV or Freemake can do it in 15-20 minutes.
DVDFab is DVD ripping software which has received a lot of positive praise. As well as being able to rip a DVD to your computer in standard formats, it can also rip only the audio. So if you’d like music from a film or show, then DVDFab can grab it for you.
Batch conversion allows you to rip more than one title at a time. Specify the start point and end point that you want to be converted in a disc, and you can also automatically crop the screen to show what you want. For a nifty Blu-ray decrypter, check out DVDFab’s Blu-ray ripper.
The DVD version is $85; the Blu-ray version is $125.
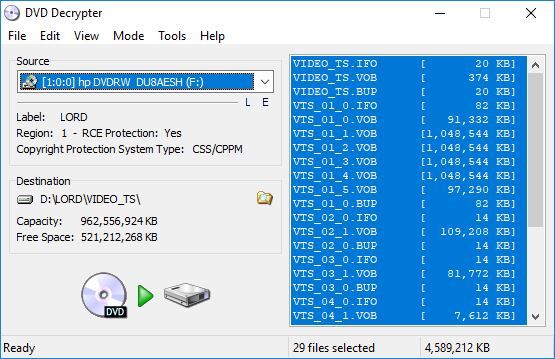
DVD Decrypter is an awesome free DVD ripper. While its official site shut down in 2005, it’s still available via an unofficial mirror. Ridiculously easy to use, DVD Decrypter loads title information making it easy to back up an entire or partial disc.
The biggest selling point of the app (and the reason it still makes our list despite its age), however, is the ease with which it can remove region restrictions from your disks. It can get rid of CSS (Content Scrambler System), user operation prohibitions, and Macrovision Content Protection with a single click. All of them are among the most common DVD issues you are likely to encounter.
Overall, it’s an excellent DVD ripping software option that’s totally free to use.
While these are the best DVD rippers and Blu-ray rippers available, there are plenty of options to rip a DVD or Blu-ray to your computer. Which option you choose depends on whether you’re ripping Blu-rays or DVDs, what file formats you prefer, your ideal quality, and more.
A while back, engineer Mark Rober built an obstacle course to try and keep squirrels from getting to his birdseed. Ultimately, the smart squirrels figured it out, so he decided to up his game with a far more complicated maze that’s even trickier to navigate. Will the squirrels get their claws on Mark’s nuts again?
While you might get the feeling that the gun world is a man’s world — it’s not.
As long as there have been guns, there have been badass women shooting them.
Lyudmila “Lady Death” Pavlichenko is always one of our favorites!
They may not always get the recognition they deserve, but today we’re going to celebrate six more awe-inspiring lady shooters that you need to know about!
Don’t worry if your favorite gal isn’t on here, though — I’m working my way through a long list of seriously cool women shooters, a few at a time.
But it never hurts to drop her name in the comments, either!
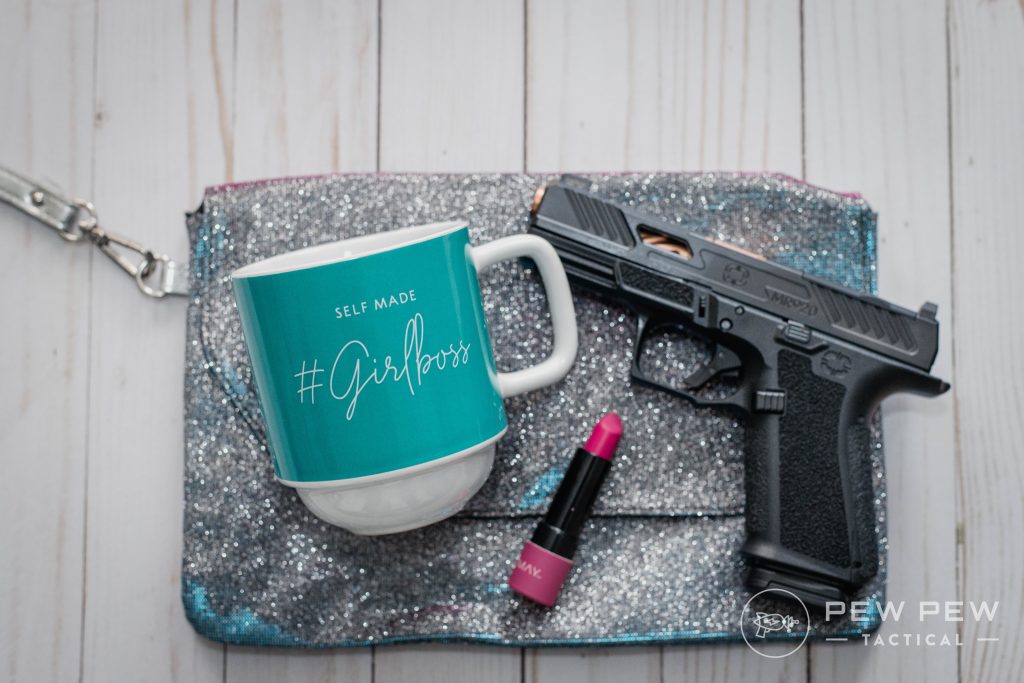
Every one of these women is the definition of #GirlBoss!
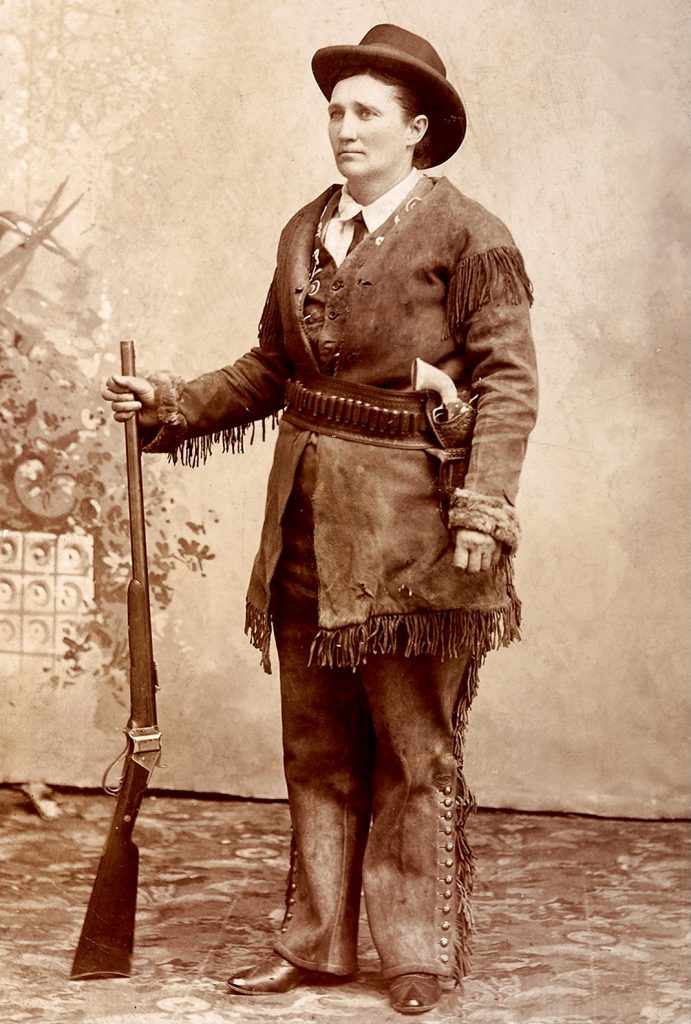
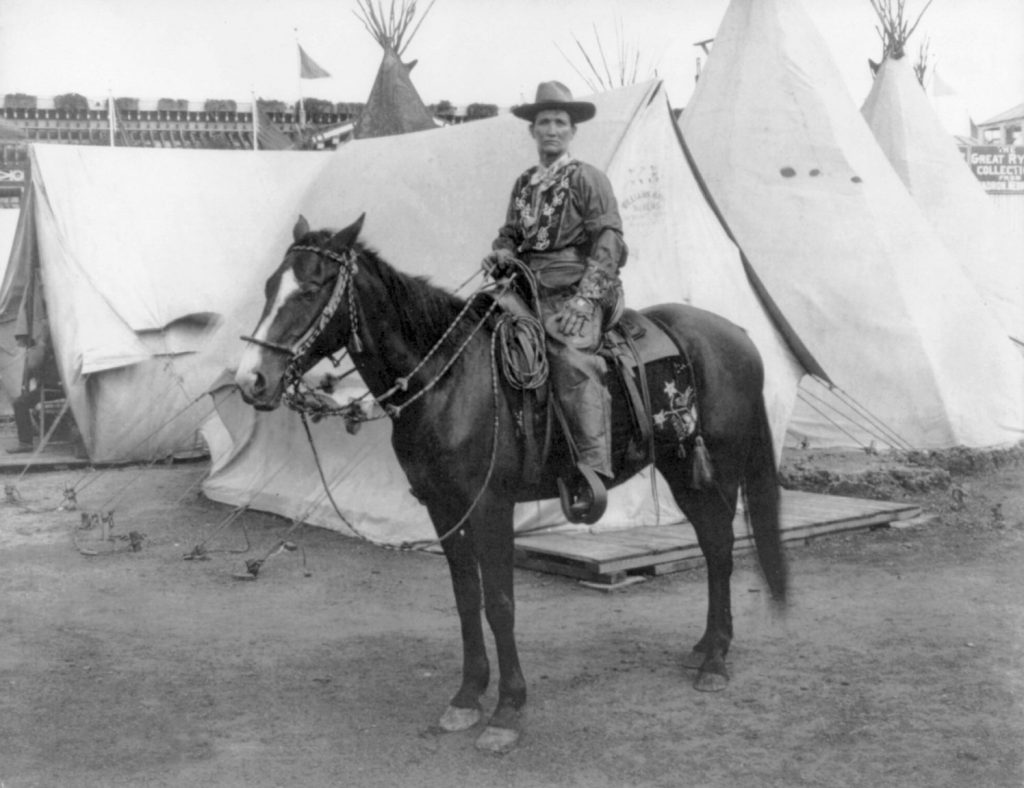
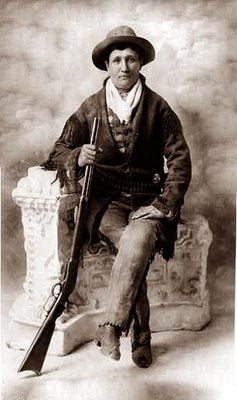
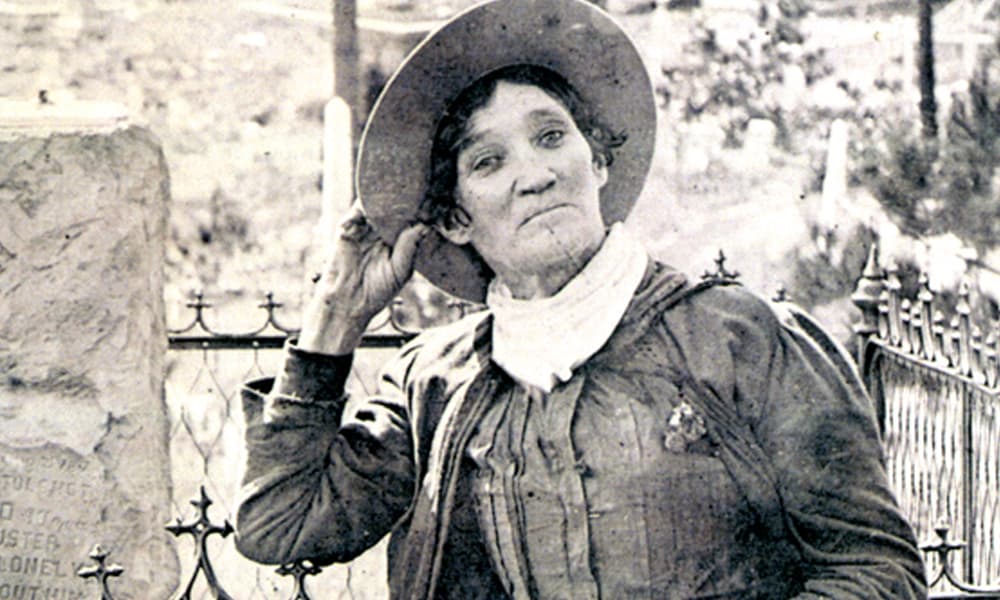
Born Martha Jane Cannary in 1852, Calamity Jane was an American frontierswoman, sharpshooter, and exceptional storyteller who is known for touring with Buffalo Bill.
Most of what we know about her life story comes from some (greatly exaggerated) autobiographical pamphlets, but there isn’t any doubt…she was a highly skilled shooter, creative survivor, and all-around tough cookie.
Calamity Jane doesn’t have time for skirts, thanks.
By age 14, Jane was in charge of raising her five siblings after losing both of her parents. She hauled the whole family off to Piedmont, Wyoming, where she began her very colorful work history so she could provide for them.
Among some of her jobs, Jane served as a scout for the Army at Fort Russell. The Army regularly engaged in skirmishes with the Native Americans living in the area.
Calamity Jane working as a mounted scout and courier.
She claimed her moniker came from Captain Egan sometime during the 1872-1873 conflict with Native Americans near what is now Sheridan, Wyoming.
But the tale was debunked by others who were there. Best we can figure, she either earned the name from a headline announcing the arrival of the Hickok wagon train…or as an unfortunate nod to her dating life.
Her autobiography says she carried dispatches at top speed to Fort Laramie. That is where she met Wild Bill Hickok.
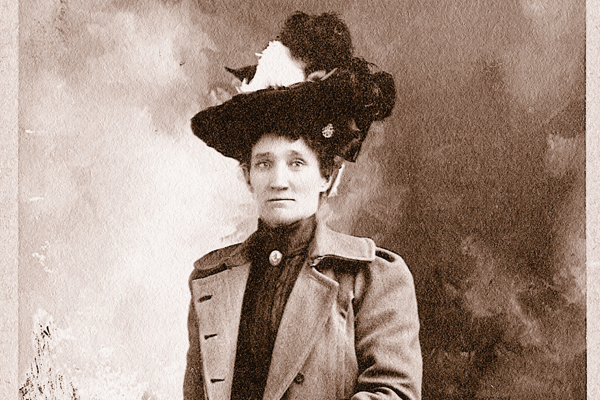
Calamity Jane in 1895
Despite her rough-and-ready reputation, Calamity Jane also came to be known for her compassion and bravery in helping others.
She saved a stagecoach from an attack and drove it back to Deadwood, SD after the driver was killed. Around 1876 or ‘78, she helped nurse the victims of a smallpox outbreak in Deadwood.
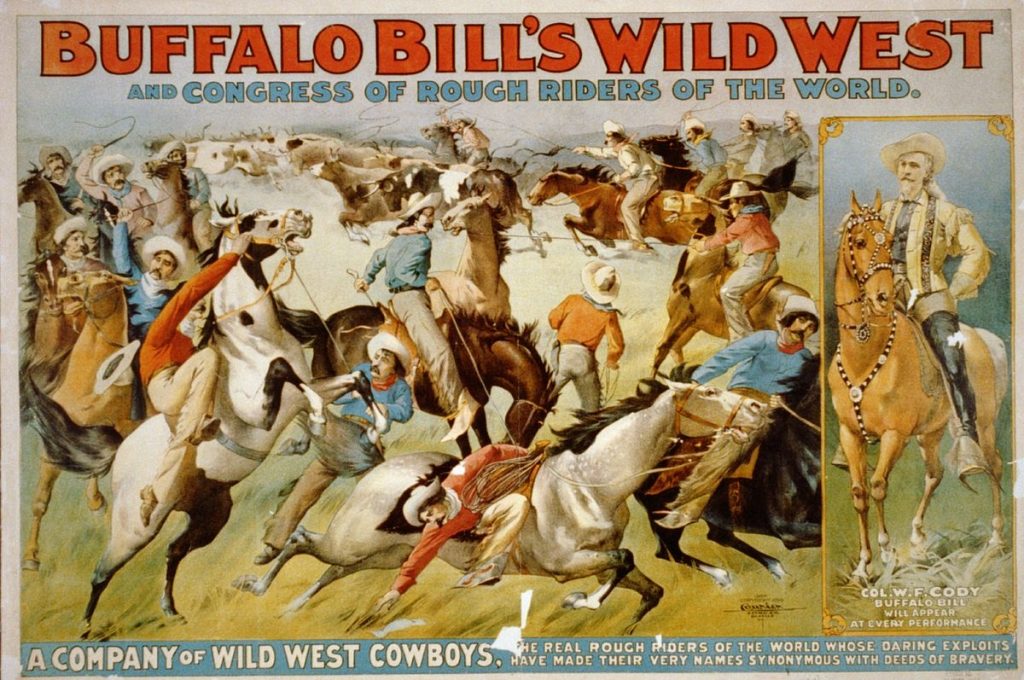
Buffalo Bill’s Wild West Show
Her later years didn’t slow her down much — she began touring with Buffalo Bill’s Wild West Show and even appeared on the Pan-American Exposition in 1901.
When she wasn’t touring, Jane owned and operated a series of inns with her husband, Clinton Burke — first in Miles City, MT, then in Boulder, MT.
Jane was a character in her own right — complex and faceted.
Rumor had it, Jane and Hickok were involved (according to her, he was the love of her life), and may have even had a daughter together.
It was known that Jane did have two daughters, but their fathers are unknown.
Calamity Jane at Bill Hickok’s Grave
She passed away in Terry, SD, a small mining town near Deadwood as a result of her long battle with alcoholism.
Jane was buried beside Hickok at the Mount Moriah cemetery in Deadwood in 1903.
2. Amy Robbins
How does a professional model end up on a list of badass lady shooters, you might ask? Well, when you’re Amy Robbins, it’s easy!
Amy Robbins
Amy wears many, many hats in her work.
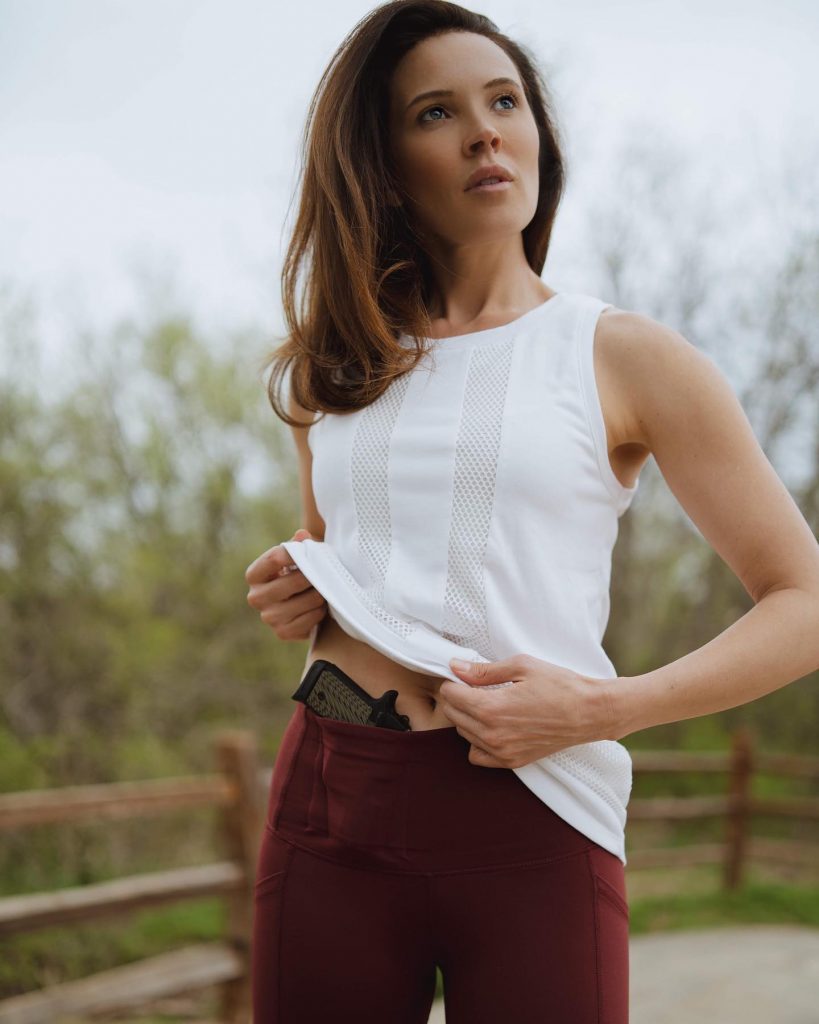
Not only is she an awesome 2A advocate, producer, writer, and host of several different firearms shows and podcasts, and avid runner — she’s the founder and CEO of Alexo Athletica.
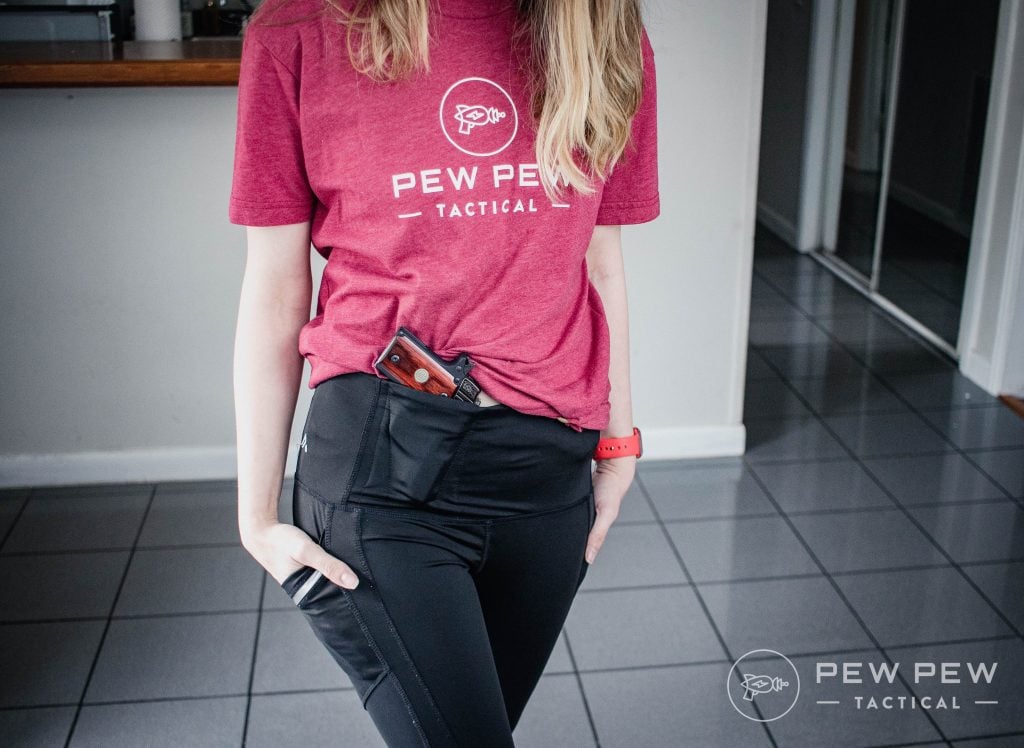
Y’know, that lil ol’ company that combined the two best things in the world as far as I am concerned — CCW yoga pants!
Jacki rocks the Women’s Concealed Alexo Athletica Leggings!
Amy grew up shooting with her father but didn’t really jump into the firearms world until she got her carry license. She ended up being scouted as a host for an upcoming firearms show with Colion Noir.
From there, Amy went on to work for NRATV, write and produce for Noir, co-host the Not Your Average Gun Girls podcast with Emily Valentine, and start her own company designing comfortable, sporty clothing that would still allow women to keep their guns handy.
Amy Robbins on the Set of Noir
“I knew that women were most vulnerable while wearing activewear, as this caused them to throw their self-defense tools in their purses. I wanted to create something that would allow them to keep their tools on their bodies and retrieve them quickly,” she told Personal Defense World.
“My dream was an entire product line that would work together to conceal whatever it was that women wanted to hold in the waistbands, but in a stylish way.”
Amy Robbins in Alexo Athletica
Anyways, there’s a reason that Alexo Athletica is one of our favorite brands for gun-toting gals. As a fashion-loving gun girl myself, I appreciate Amy’s creativity and drive!
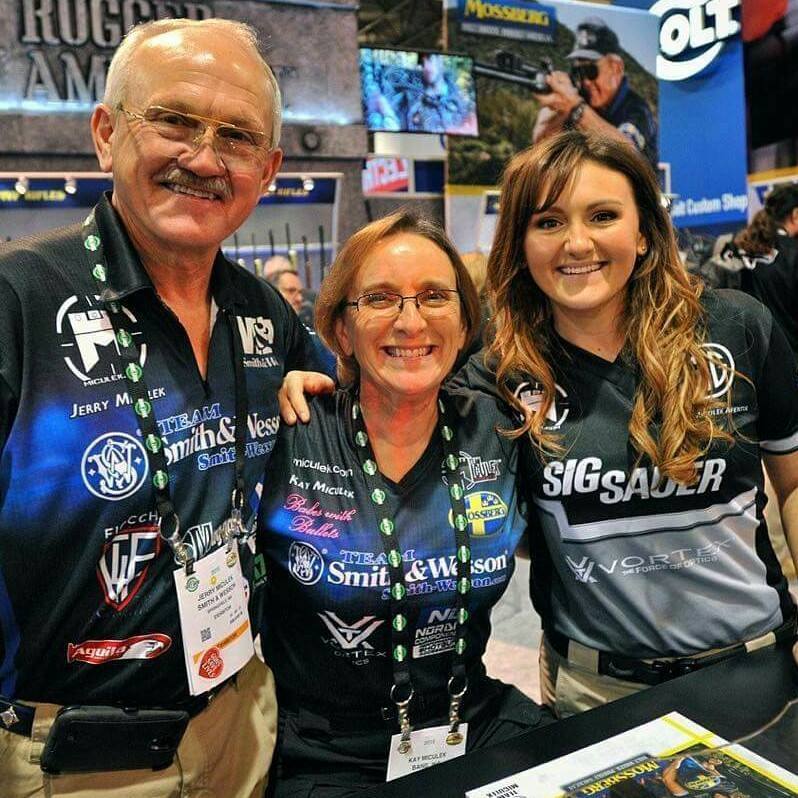
3. Kay and Lena Miculek
For our number three spot, we have a bit of a tie.
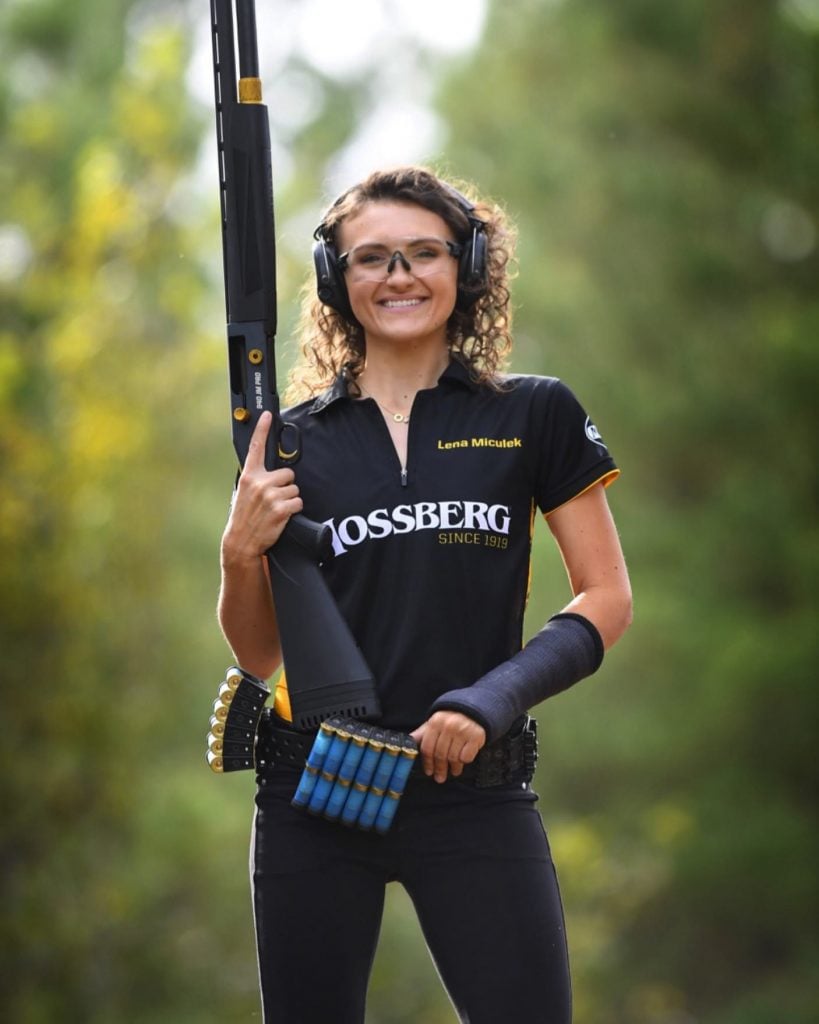
This mother-daughter duo was highly requested by our readers, and I am more than happy to share just how cool Kay Clark-Miculek and Lena Miculek are!
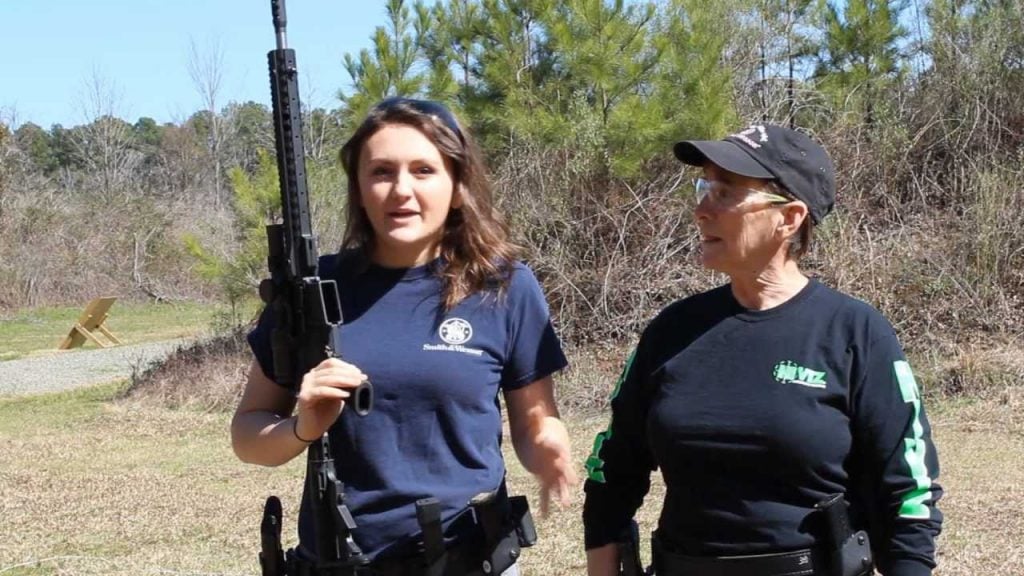
Lena Miculek (left) and Kay Clark-Miculek (right)
You may have heard of Jerry Miculek — I guess he’s pretty famous for a male shooter. (I’m kidding, I’m kidding! Of course, you know who he is!)
He also happens to be the husband of ISPC World and ISPC US Handgun multi-gold-medalist Kay Clark-Miculek and father of ISPC World Handgun and Shotgun multi-gold-medalist Lena Miculek.
The Miculek clan
Between the three of them, that family has a lot of gold medals, and even more shooting experience!
Kay is the daughter of a gunsmith and nationally ranked bullseye shooter. She shot on her high school rifle team with her brother before beginning to compete professionally.
She even met her future husband at the Bianchi Cup.
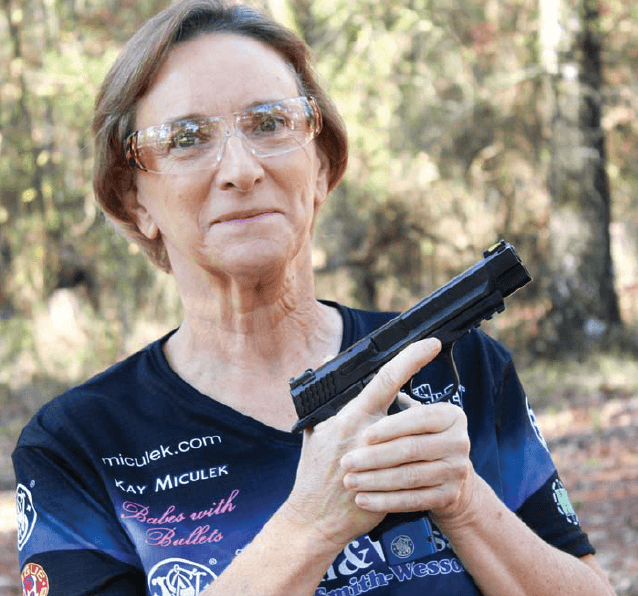
Kay Miculek
She founded Babes with Bullets, a women’s handgun shooting camp that tours the country and teaches women how to shoot. She’s also a host for the Outdoor Channel.
While we’d never tattle on a lady’s age, Kay has plenty of experience and translates her skills into teaching women who got into shooting later in life.
Empowering women is cool, and Kay has spent her life working towards that.
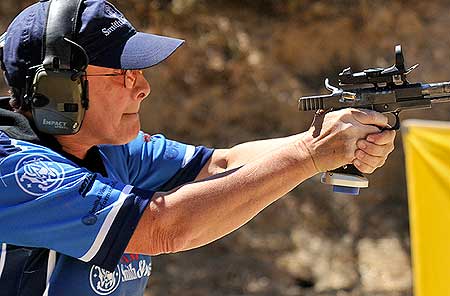
Kay Miculek competing
Her daughter, Lena, is a champion shooter in her own right!
Lena began competing at 8 years old after traveling with her parents to matches for most of her life. She also hosts over at the Outdoor Channel and is the driving force behind her father’s YouTube channel.
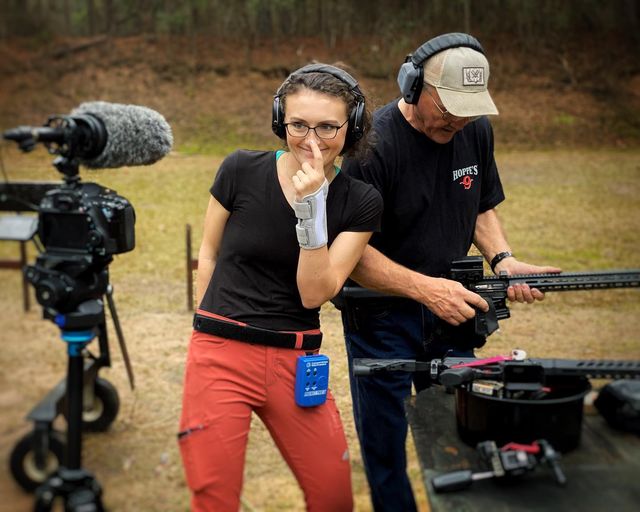
Lena Miculek
Lena also is a highly active competitive shooter, like her parents. She often competes in competitions for 3-Gun, USPSA, Steel Challenge, outlaw PCC matches, IPSC Shotgun, and IPSC Rifle.
Even a broken arm doesn’t stop her!
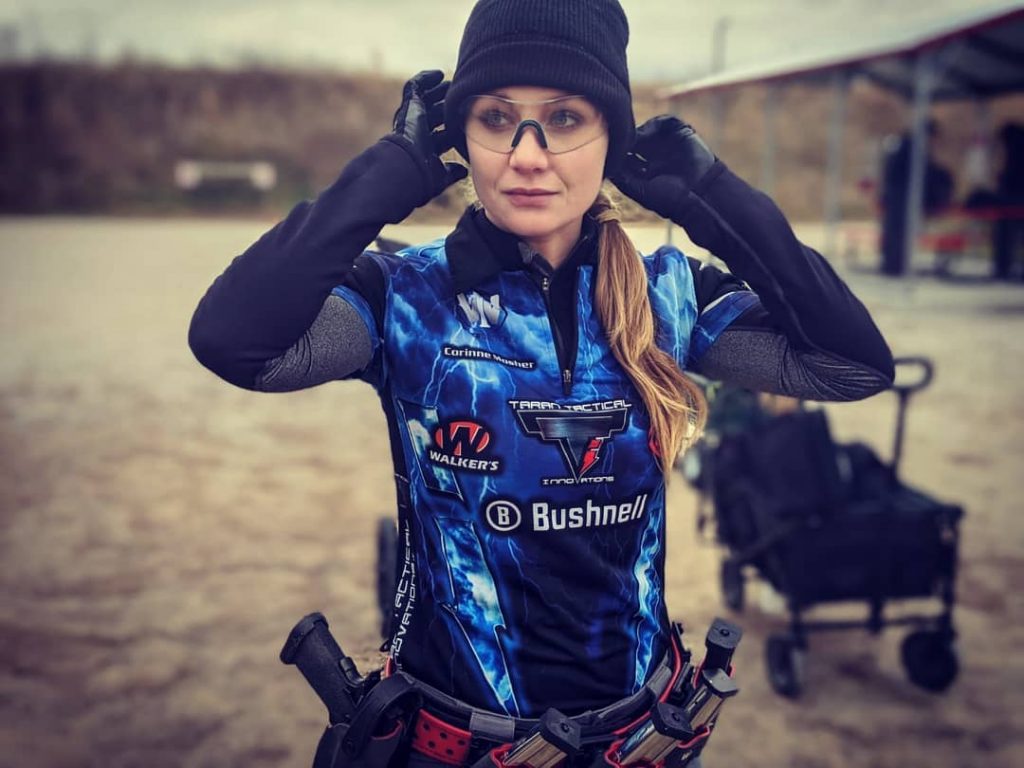
4. Corrine Mosher
Unlike most of the others on our list, Corrine Mosher wasn’t raised around guns.
She’s the daughter of two Marines, but she didn’t begin shooting until her husband encouraged her to get her concealed carry permit.
Even then, she tells Shooting Sports USA, “I did fairly well, but I didn’t necessarily enjoy it.”
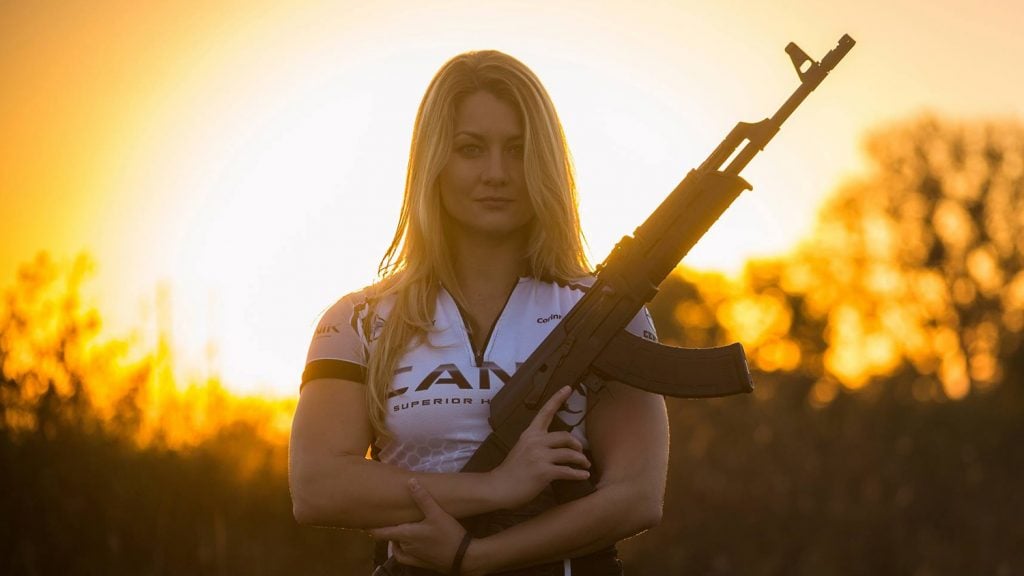
Corrine Mosher
Corrine is a natural-born teacher though. She found herself working as a firearms instructor for the training company she founded with her husband.
From there, she moved to a position as the Director of Education at Centerfire Sports in Olathe, KS.
Corrine Mosher at competition
It didn’t take too long for Corrine to grow interested in the competitive side of shooting.
She’s an avid and decorated 3-Gun competitor and a vocal advocate of the AK platform.
Queen of the American AK
Before she became a famous gun gal, Corrine had an unlikely background as a trained violinist.
She attended the University of Missouri Kansas City Music Conservatory, and even had her own private music studio for several years, where she taught!
5. Jane Frazier
This one might be a little more rumor than reality, but we still think her story is worth sharing.
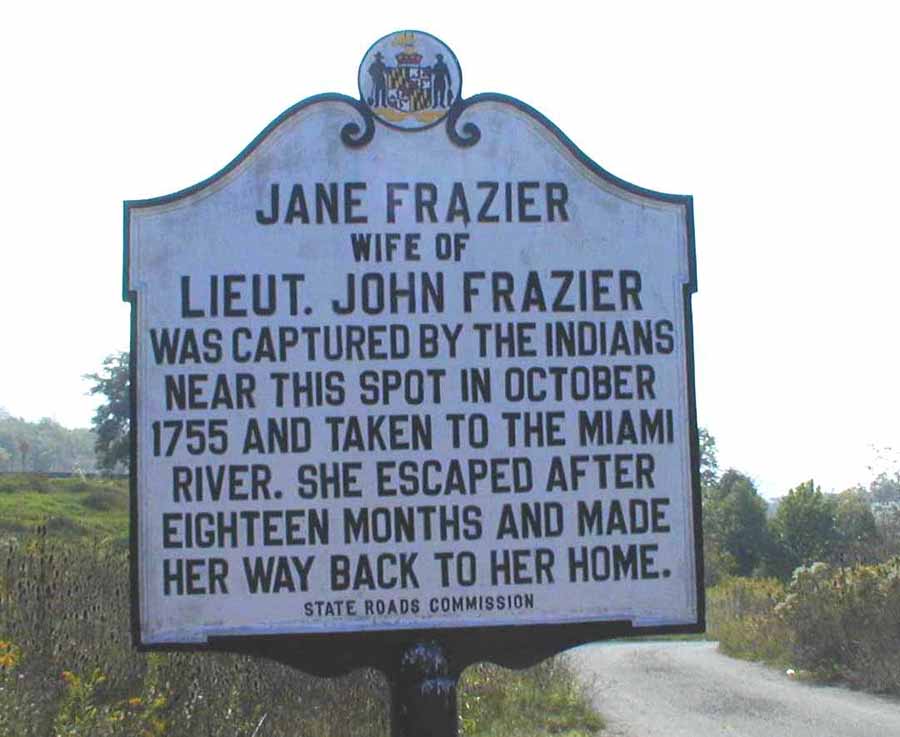
Jane Frazier (also spelled Fraser or Frazer) was the wife of Scottish gunsmith, fur trader, interpreter, and British Army Lieutenant John Frazier. They lived in the Province of Pennsylvania after they married in 1754.
Jane Frazier
In 1755, Jane was returning from the Cumberland trading post to her home, accompanied by the couple’s hired hand, Bradley. They were ambushed by Native Americans and Bradley was killed.
Jane, pregnant and close to giving birth to her first child, was captured and brought to live with the tribe.
An artistic rendering of Jane’s capture
According to her account, the tribe adopted Jane. She eventually gave birth to her child, but the child passed away after three months.
Grieving all that she lost, Jane planned an escape with two other captured fur traders.
The group scavenged supplies and a broken rifle from the camp as they waited for another raid to provide them the opportunity to escape.
Some accounts say Jane used skills she’d learned from her husband’s gunsmithing to repair the rifle — which is what lands her on this list, whether or not it’s true.
Jane Frazier Historical Marker
After 13 (or possibly 18) months of captivity, Jane escaped and made the nearly two-week journey home. She ventured on alone after the men she escaped with were unable to continue.
When she returned home, Jane found out had remarried, thinking she was dead!
For Jane, the story ends well, though — her husband took her back and they later had three children. (The second wife returned back to her father. Oops.)
The Frazier House
6. Melody Lauer
Finally, I want to introduce you to Melody Lauer.
She acts as one half of the team behind Citizens Defense Research and an all-around amazing instructor.
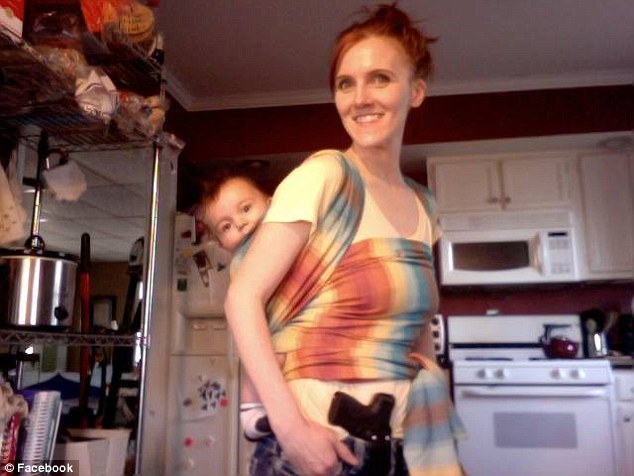
Melody Lauer
What sets Melody apart? She burst onto the self-defense scene as one of the first women to talk about defensive carry with a child.
After all, moms want to protect their families, too.
Melody Lauer demonstrating baby-wearing and IWB carry!
Unfortunately, not many courses exist on the topic of carrying as a parent or guardian.
But Melody and her partner John Johnston at Citizens Defense Research created the definitive course for parents, babysitters, grandparents, or anyone else who carries a gun while with kids.
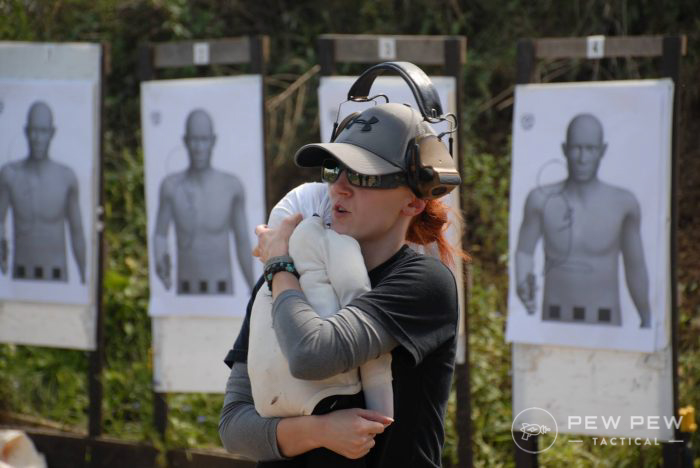
Melody Lauer teaching The Armed Parent/Guardian.
The Armed Parent/Guardian is must-have training with both a classroom session and practical range practice to prepare you to engage threats with a child in your care.
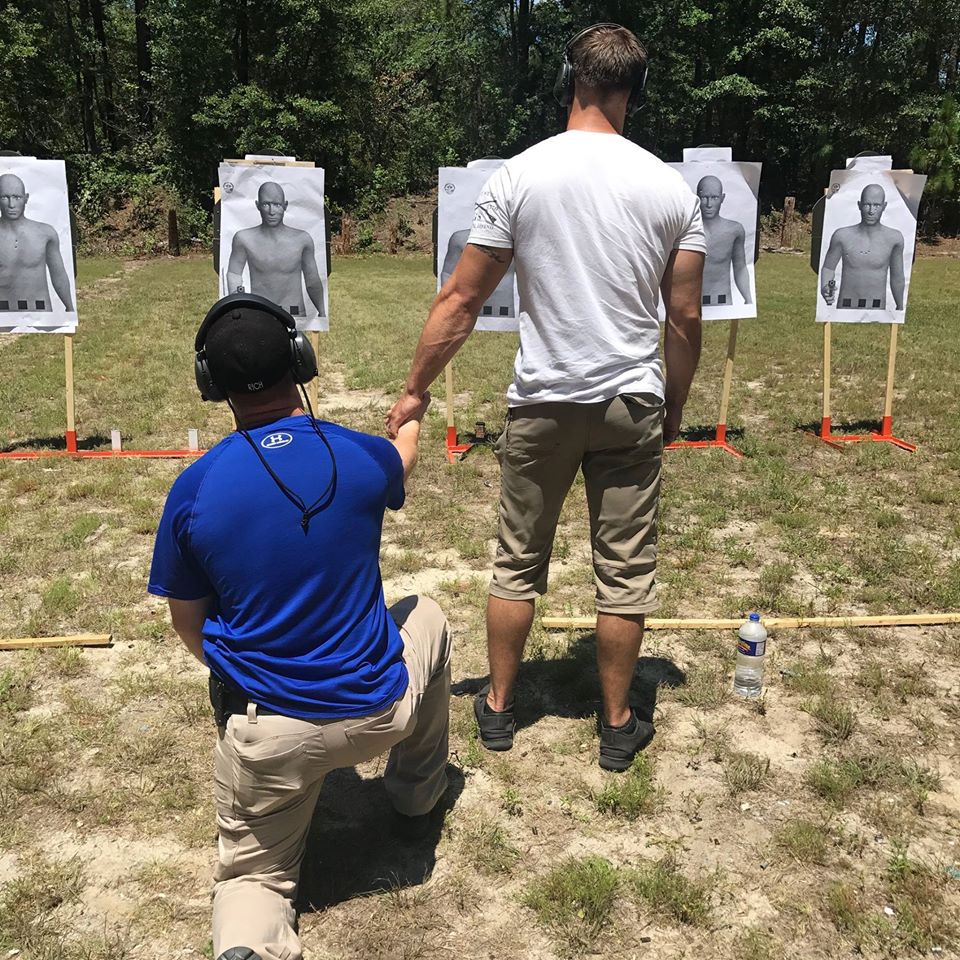
Drilling hand holding in one of Melody’s classes
In addition to being a phenomenal instructor with a unique area of expertise, Melody is also an active EMT, a martial artist…and a mom!
If you’re looking for training specifically as it applies to caregiving…Melody is your expert!
Seriously…no one knows this stuff better than her!
(We also have an article about self-defense with kids…but nothing replaces hands-on training.)
Conclusion
As it turns out, there are a lot of really cool women out there in the gun world. Some develop cutting-edge training, others design gear, and even more wait in the annals of history for us to rediscover them.
After all, someone has to train the next generation of badass lady shooters!
But no matter what makes them a badass lady shooter…we’re excited to share them with you!
Now it’s your turn — who is your favorite lady shooter? Share their name or their story in the comments! Want more content for the gals? Check out our woman-centric articles. But if history is more your jam…check out our history category!
We’ve seen how individual blacksmiths and blademakers painstakingly handcraft knives one at a time. This factory footage from Sweden’s Morakniv shows us the opposite – how robots and other machines crank out thousands of knives each day. Humans are still involved in the assembly and quality assurance processes.
Now that we know COVID is spread via aerosol rather than fomites, having clean air is of more concern than clean hands. Automaker Ford, working together with fan manufacturer Lasko, is addressing this with their design of a simple air filtration system centered on a common box fan.
The design stemmed from research conducted "using supercomputer air flow analysis to determine if a low-cost box fan air cleaner can mitigate the risk of airborne transmission of COVID-19 in a classroom equipped with a single horizontal unit ventilator."
"The study found that box fan air cleaners like this can serve as an effective low-cost alternative for mitigating airborne transmission risks in poorly ventilated spaces."
Ford and Lasko’s inexpensive fix is simply a cardboard cutout that supports an ordinary air filter (they’re recommending MERV 13 or higher, so it looks like you don’t have to go full HEPA) and attaches to a box fan.
They’re calling it the Scrappy Filtration system, and they’ve donated 20,000 kits to schools in underserved communities.
If you want to make your own, they’ve got a template you can download here.
MySQL is heavily tunable and some of the configuration can have significant impact on its performance. During my experiment for numa scalability I encountered one such configuration. Default configuration tends to suggest heavy contention for write workload but once tuned it helps scale MySQL by more than 2x.
Understanding the problem
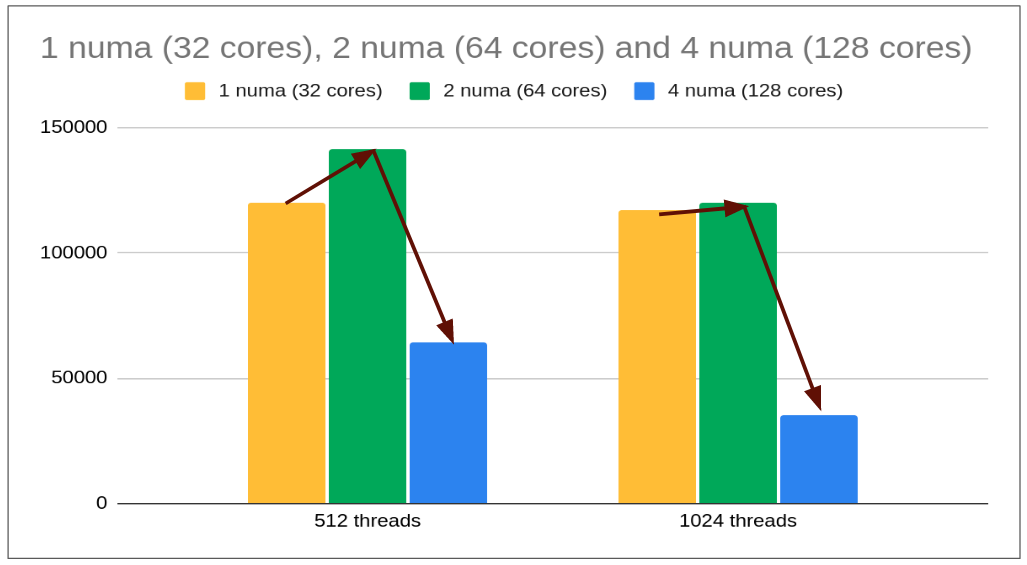
I started testing write-workloads with different numa levels (1 numa [32 cores]/2 numa [64 cores]/ 4 numa [128 cores]) and observed a weird behavior.
With increasing compute power we expected throughput to grow. The pattern is observed when we move from 1 numa to 2 numa but there is significant throughput loss (despite double compute power) when switched from 2 numa to 4 numa.
This is exactly what we call as NUMA SCALABILITY BOTTLENECK (vs a SCALABILITY BOTTLENECK that tends to achieve optimal performance with a given set of compute and io resources).
server: mysql-8.0.24. configuration: click here (+ skip-log-bin) machine: ARM machine (kunpeng 920 (2 sockets, 128 cores, 4 numa nodes), nvme ssd) workload: sysbench update-index (cpu-bound)
Identifying the bottleneck
To get more insight on contention I resorted to perf-schema.
Surprisingly the 2nd most contended mutex is rollback segment mutex. (1st being trx_sys that is a known issue and mysql hopefully is working on it to make trx_sys lock-free).
Fortunately, there is a way out.
undo tablespaces
MySQL has been working on improving the undo tablespace framework for quite some time, starting with undo tablespace truncation (and I am fortunate enough to code it back in 5.7x timeframe). I still remember discussing the limitation of the 128 rollback segments but given it would need major change it was deferred to 8.x and eventually it came with 8.x (changes around 8.0.14 and then again 8.0.23) where-in user can now configure extra undo tablespaces and that in turn defines number of rollback segments.
Here is the latest and simplified view:
InnoDB will create 2 default undo tablespaces (also known as implicit tablespaces)
Users can add 125 (maximum) undo tablespaces (also known as explicit tablespaces).
Total: 127 undo tablespaces.
Each undo tablespace can host 128 rollback segments (controlled using innodb_rollback_segments).
So 127 * 128 = 16256 rollback segments are available for transactions.
mysql> show status like '%undo%';
+----------------------------------+-------+
| Variable_name                    | Value |
+----------------------------------+-------+
| Innodb_undo_tablespaces_total    | 127   |
| Innodb_undo_tablespaces_implicit | 2     |
| Innodb_undo_tablespaces_explicit | 125   |
| Innodb_undo_tablespaces_active   | 127   |
+----------------------------------+-------+
4 rows in set (0.00 sec)
(It is just 128 rollback segments in 5.7. Starting 8.x given 2 default undo tablespaces 256 rollback segments are made active by default)
Resolving Contention
So with default 2 undo-tablespaces only 256 rollback segments are made active and N transactions will share these rollback segments. With N = 150K approximately 586 transactions use the same rollback segments creating heavy contention as all of them need the said mutex latch in order to add their undo-logs to transaction history during commit stage (check trx_write_serialisation_history for more details).
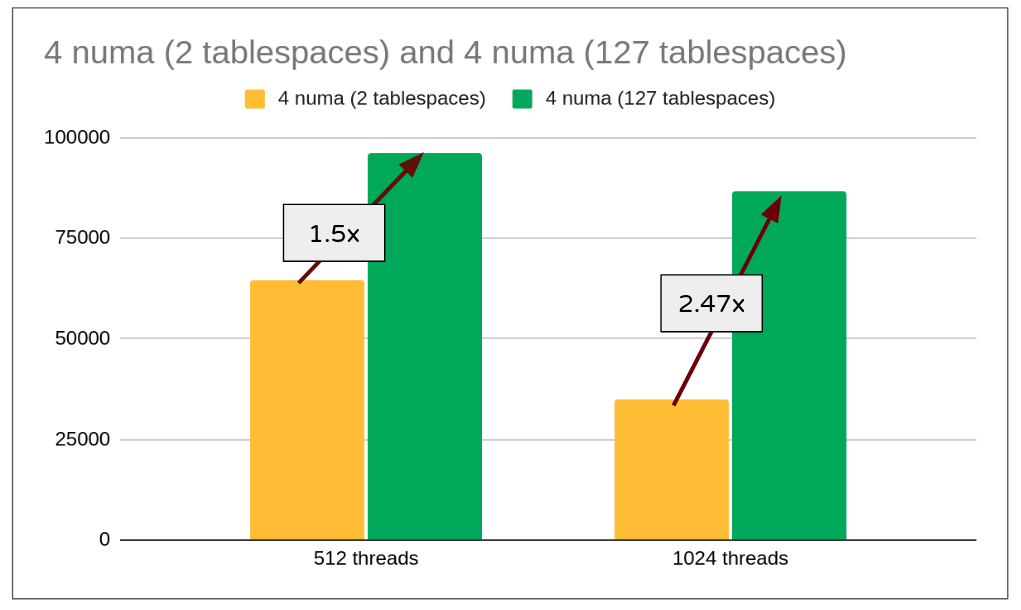
If we create additional 125 explicit undo tablespaces it would make 127 * 128 = 16256 rollback segments that is around 9 transactions per rollback segment significantly reducing the contention.
Wait has reduced from 78933376 milli-seconds (77 seconds per thread) to 213977 milli-seconds (0.2 seconds per thread).
Fallback (if any?)
Approach of increasing undo tablespace is really good but enabling 125 explicit tablespaces consumes disk space and to keep this in limit users should configure undo tablespace truncate.
Default innodb_max_undo_log_size = 1GB assuming all 127 tablespaces are growing uniformly, truncate will not kick in till all of them are around 1GB in size there-by consuming 127GB of the disk space.
If you plan to enable 127 tablespaces then better is to reduce the innodb_max_undo_log_size (unless disk space is not a concern).
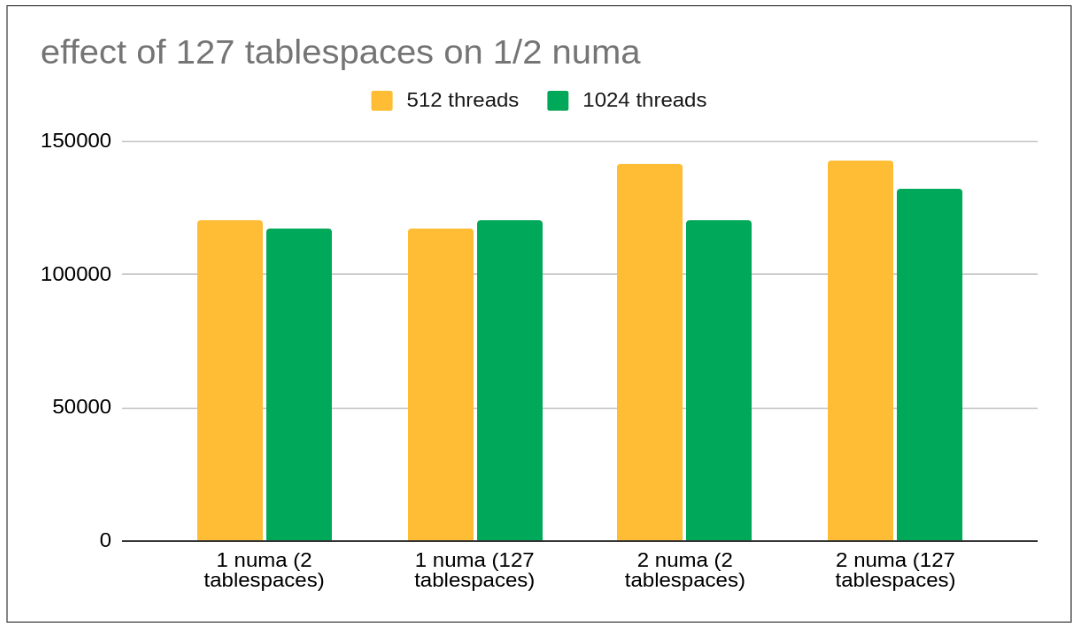
Effect of enabling 127 tablespaces on lesser numa nodes
As we could see there is negligible/marginal effect on enabling 127 tablespaces for lower numa nodes. NUMA scalability fix/solution effects are observed with increased numa nodes but minimal change is observed for lower numa nodes. We can have a separate blog post about NUMA scalability explaining why such effects are observed.
Conclusion
Scaling MySQL for NUMA has its own challenges and while the solution for some of these problems pre-exist extra configuration may be needed. It would be really helpful if MySQL can auto detect and configure some of these limits based on the numa configuration it is running on.
If you have more questions/queries do let me know. Will try to answer them.
Everyone should avoid bug bites. For a bug repellent that’s safe and effective—and that won’t stink or leave a puddle of oil on your skin—skip the DEET and get a picaridin formula, like Sawyer Products Premium Insect Repellent with 20 percent picaridin. It’s the best bottle of bug spray we found after testing 17 repellents and talking to everyone—from the EPA to the American Mosquito Control Association. One fact to establish up front: There’s no evidence that mosquitoes can transmit the coronavirus—but the diseases that biting insects do carry ain’t no picnic either.